Category Archives: My Working Methods

Wax Steam Outs
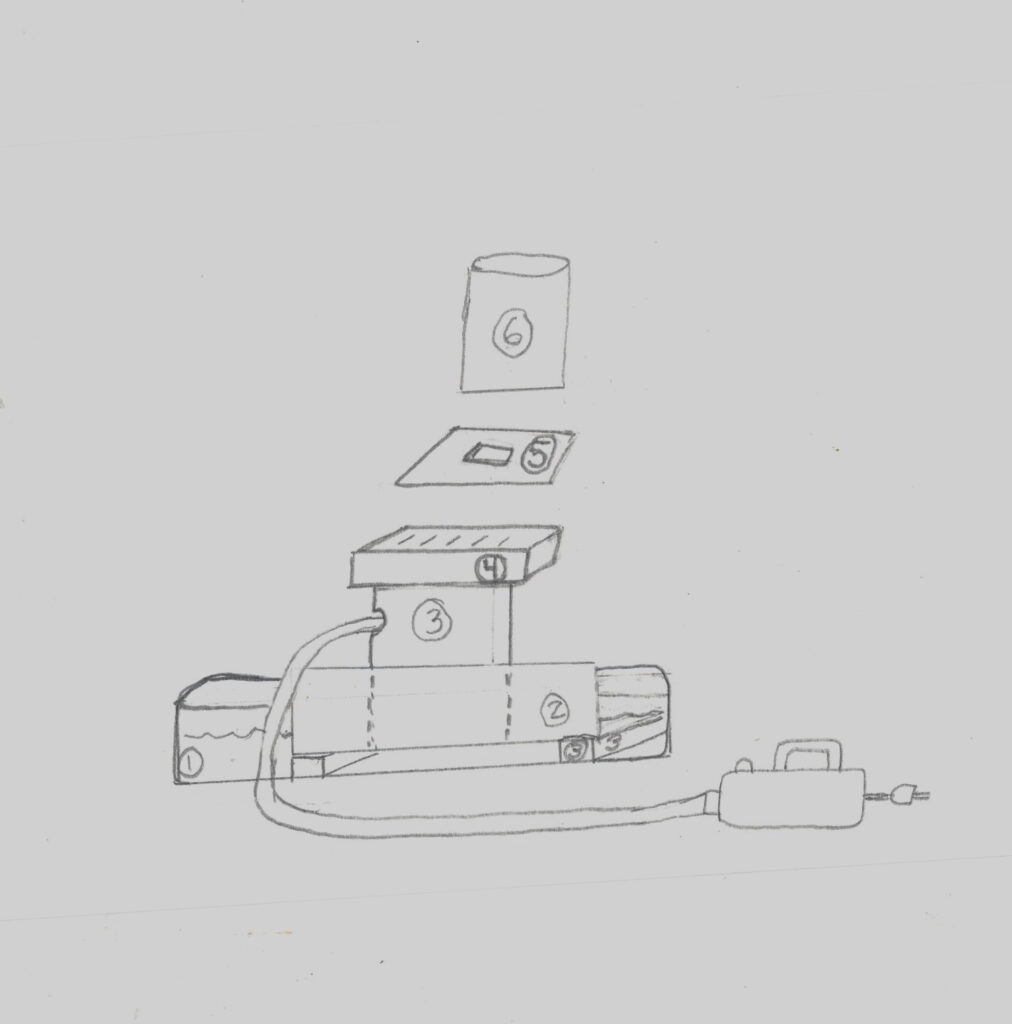
WAX STEAMER SET UP
Supplies:
1. Disposable Turkey aluminum Roster Pan.
2. Disposable Lasagna aluminum pan
3. Sturdy Plastic or Metal Tube set on slats (1/4 to 1/2 inch)
4. Sturdy Grate (such as an irrigation cover)
5. Galvanized sheet thin enough to cut a hole so the steam hose can be directed into the mold.
6. Wax Cast Investment Mold ready to steam out
7. Towel to wrap around the mold and help reduce air leaks
8. A stick to pock the wax melting from the mold to keep the wax flowing out of the mold.
9. Wall paper steamer.
Most supplies come from a hardware store. The aluminum pans come from a grocery store.
Pate de Verre Clay to Refractory Mold Part 1 Test Tiles
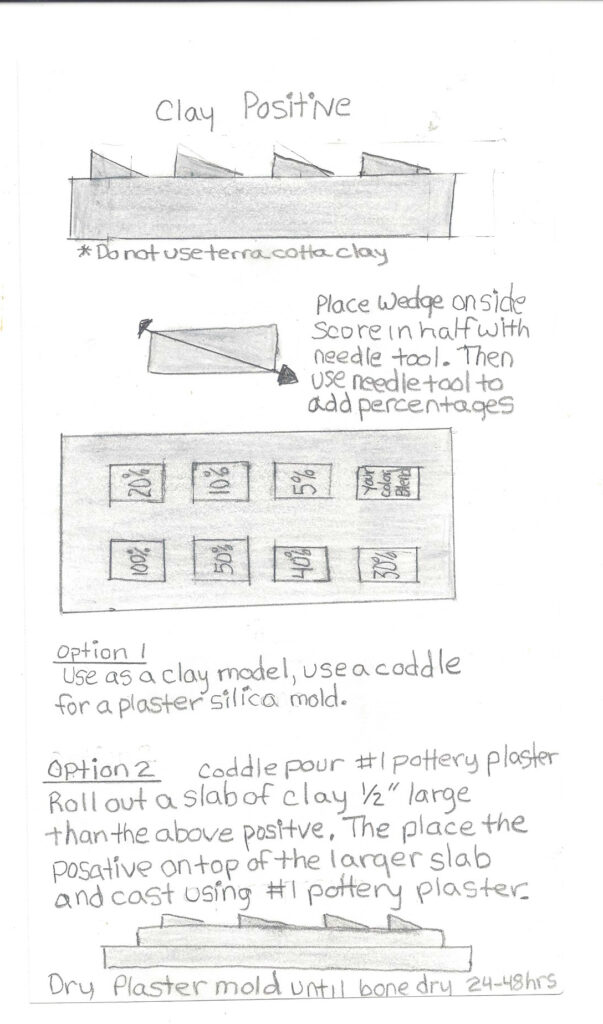
Pate de Verre Mold Making Investments Part 2
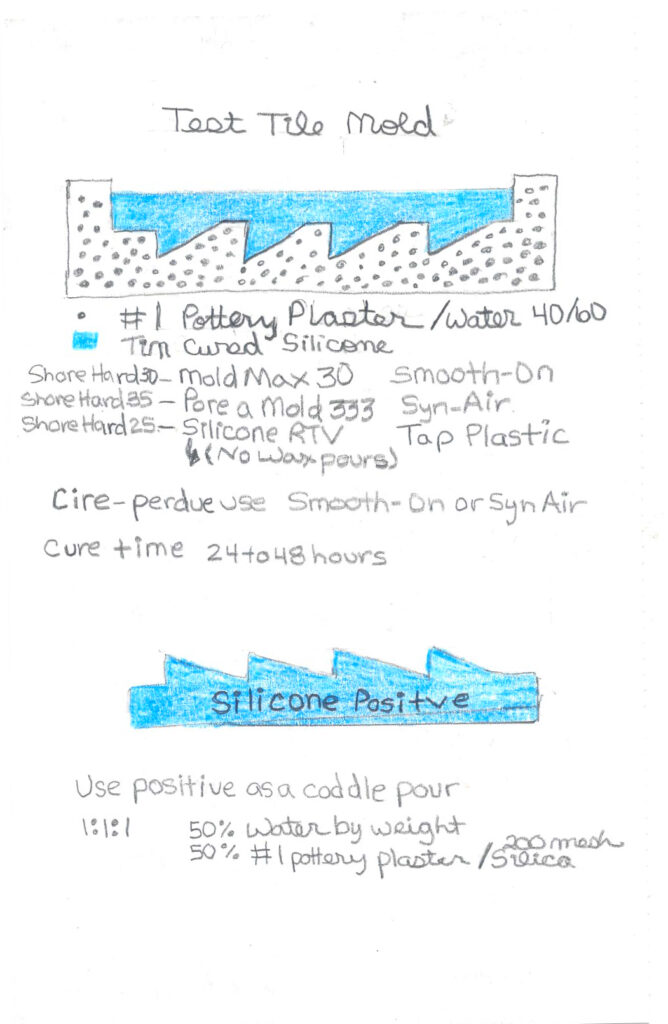
1:1:1 or 1 part #1 pottery plaster added to 200 mesh silica and Water by weight. Using a silicone negative lets me reduce the time spent to get color samples for my art. This approach works well for thin pieces but the thicker the artwork gets the color become quite dense. The principle remains the same but the clay forms can change to allow for the direction work and the thickness of the piece and light you want to transmit.
Pate de Verre Silicone Positives Part 3
You can make a #1 pottery plaster mold to create a silicone positive. The positive once cured gets to be used for a coddle pour of #1 pottery plaster and 200 mesh silica to make make an investment mold that can endure the heat of the kiln. if you have many test tiles to make using silicone positives really reduce the time spent to make simple test tiles of varying color degrees. While my tiles are thin I can vary colors concentrations to allow for high and low lights to the work. In the early 2000’s at a BeCon conference Jim Jones was the sales director doing a demo of frit tinting. As a pate de verre artist I was captivated by the concept. While the demo was a single color the idea can accommodate custom blends of your choosing and allows for creative variations to support the artistic need. As usual Bullseye empowers artist to springboard ideas and use their imaginations to tweak and provide artists a lot of artistic freedom. Here’s the link to Bullseye’s literature on frit tinting.
http://www.bullseyeglass.com/methods-ideas/frit-tinting.html
Unfired Test Tiles ready to go into the kiln Part 4
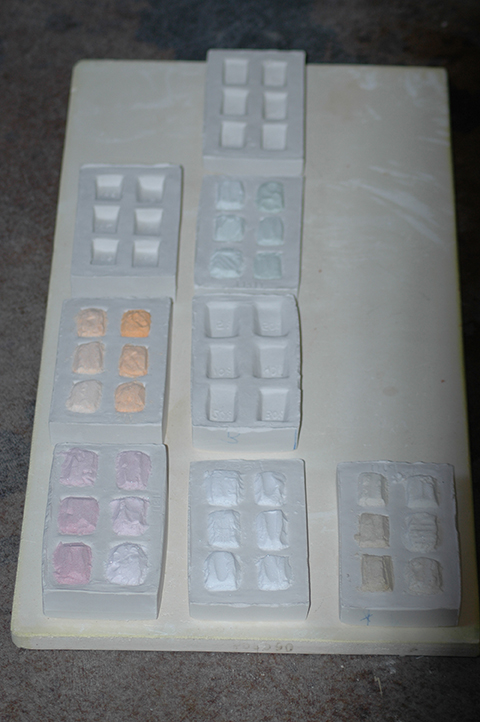
Pate de Verre Test Tile Part 5
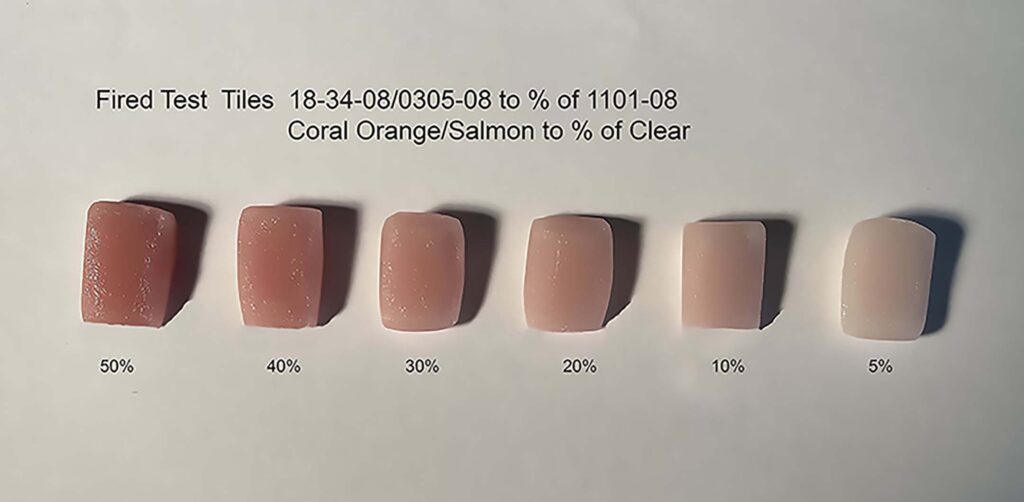
50/50 Color to Clear
40/60 Color to Clear
30/70 Color to Clear
20/80 Color to Clear
10/90 Color to Clear
5/95 Color to Clear
Colored powders were combined and mixed thoroughly in a lidded container with enough volume of color to use the base colored glass to a percentage of clear as shown above. Use a N95 respirator when using dry glass, especially powders. I tend to mix powders outside under cover as fine particles the eye cannot see remain in the air for 8 hours. Once the clear and colored mix is wet using a pate de verre glue. I have track lighting which is how I discovered the finest of particles in the air. Another reason to wet mop my area after doing art.
Pate de Verre Test Tiles Part 6
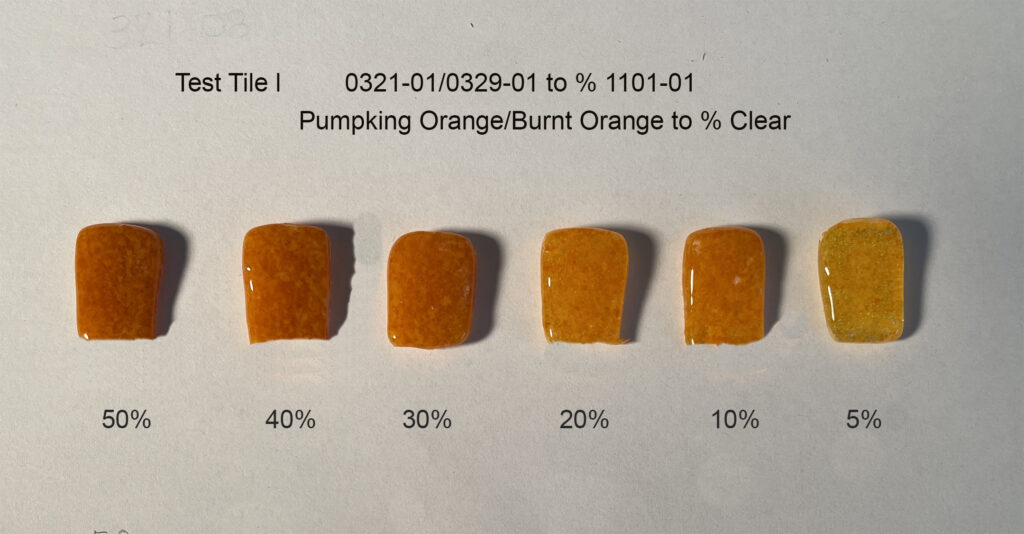
40/60 Color to Clear
30/70 Color to Clear
20/80 Color to Clear
10/90 Color to Clear
5/95 Color to Clear
Colored frits were combined and mixed thoroughly in a lidded container with enough volume of color to use the base colored glasses to a percentage of clear as shown above. Use a N95 respirator when using dry glass, especially powders. Once the frit is wet using a pate de verre glue. I tend to mix dry frit and powders outside under cover as fine particles the eye can not see remain in the air for 8 hours. I have track lighting which is how I discovered the finest of particles in the air. Another reason to wet mop my area after doing art.
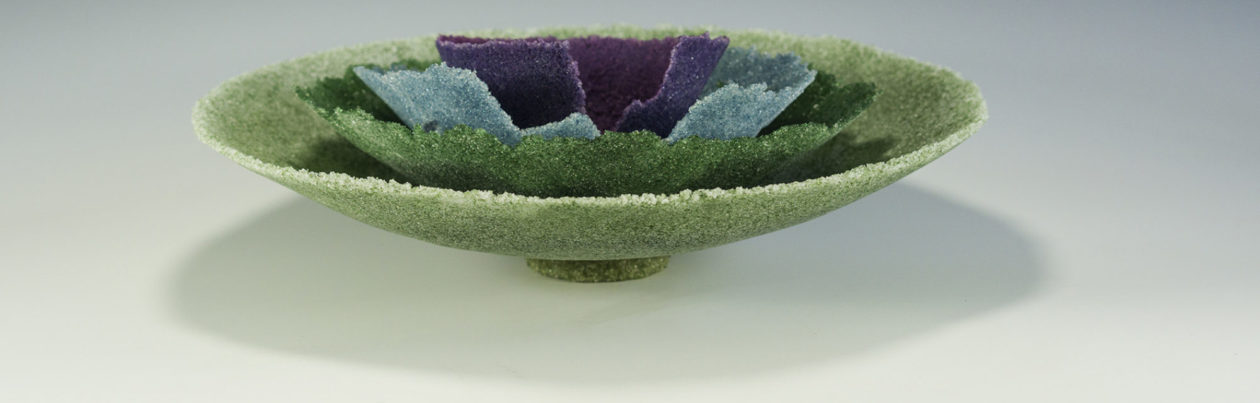
Sintered Method – A Second Method
Rather then using a plaster silica mold and talc as an inner core, this method uses a ceramic fiber mold and no inner core. This creates a sugar crystal effect on the outside of the piece and a shiny texture on the inside of the piece.
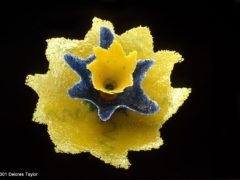
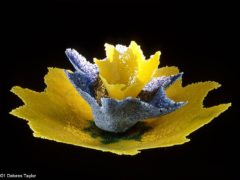
“Mars” (c) Artglassconcepts.com
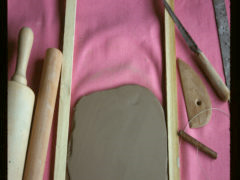
Making A Model In Clay – Part 1
First I decide how the piece will be mounted, which impacts the design. I will either use a plaster hump mold or hand build the clay. Use of rails provide a even thickness of the clay. I have found this impacts both the firing and the final look of the product.